Midi-triggered blender drummer model

My most recent challenge: using midi signals to drive a 3d model of a drummer and drumkit.

For music production I use ardour and hydrogen, synchronized by the jack audio connection server. For this project I set up an audio project for the classic Cheap Trick “Surrender” song and painstakingly created the drum midi track on hydrogen. I had to set more than 20 tempo changes just to keep it reasonably in-sync with the original performance!

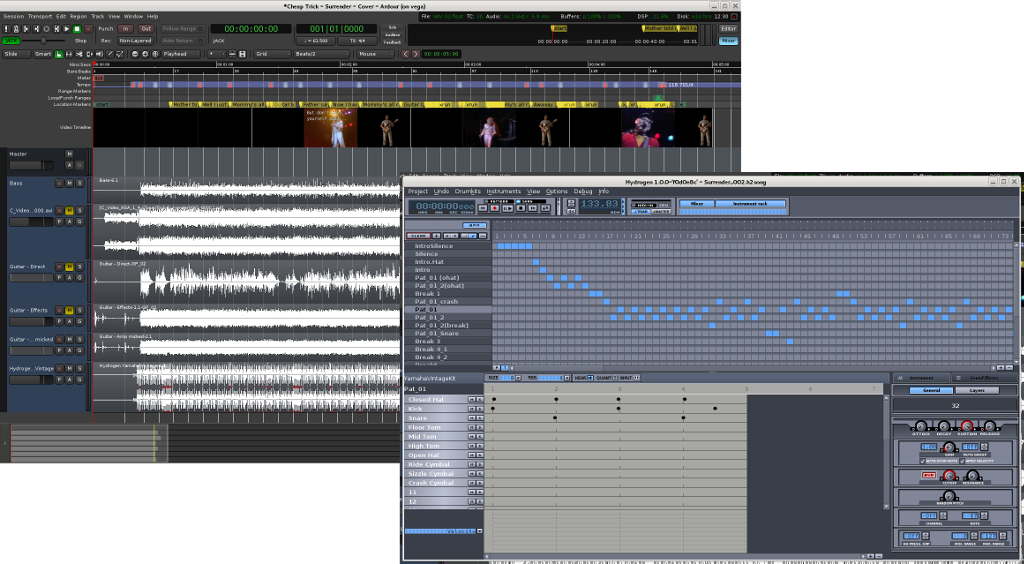
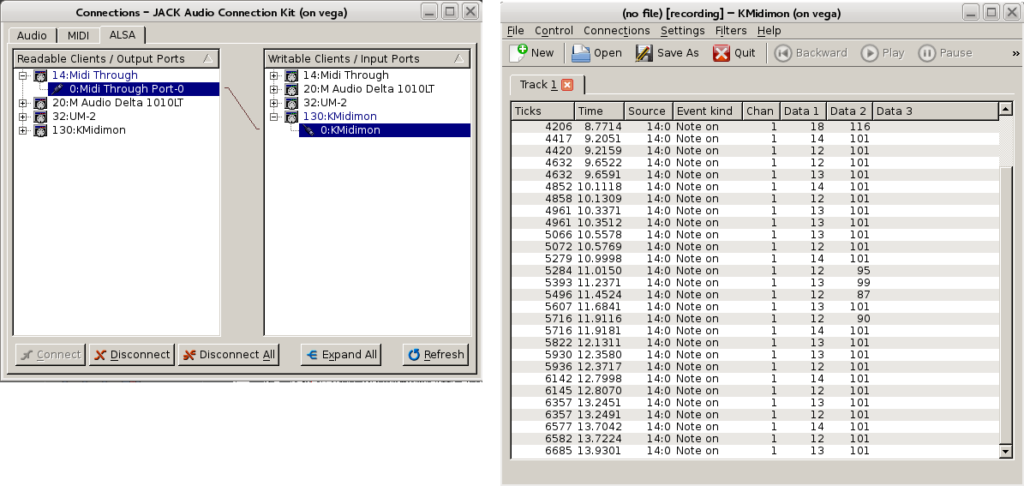
The result was a stream of midi signals that were captured to a text file using the very useful kmidimon tool:

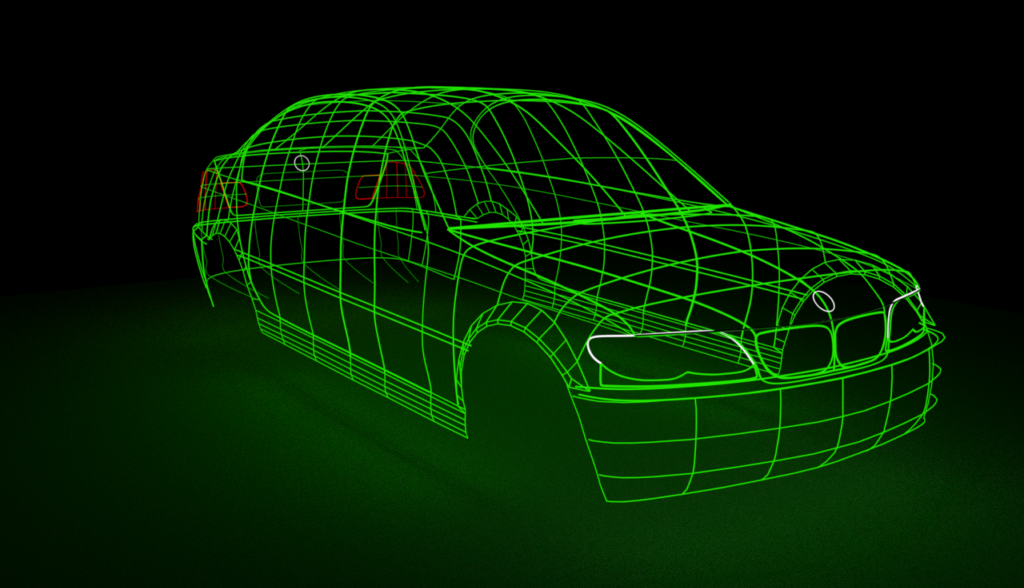
The drummer model was sketched using Makehuman, and the resulting model and armature loaded in a blender model of a vintage drumkit.

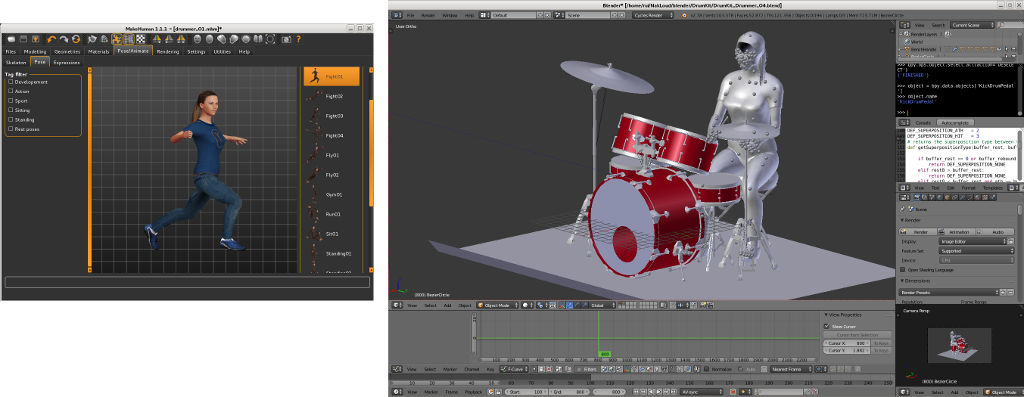
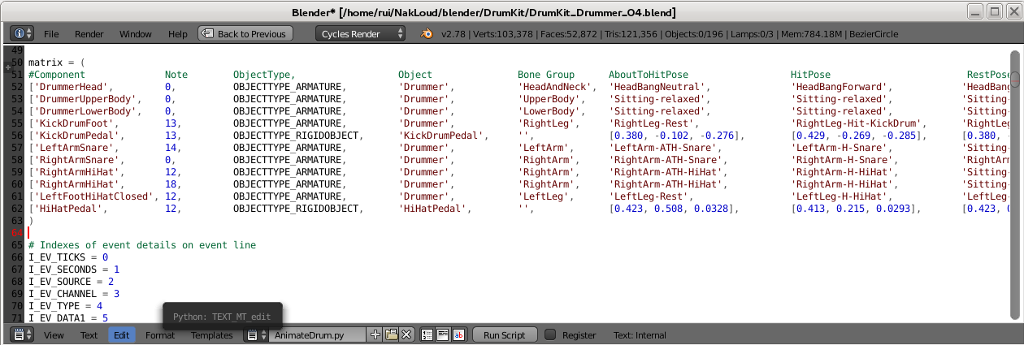
The script is a bunch of python code that loads the file with the midi events and then inserts the keyframes for the poses at the right frames on the animation.

The first result shows an awkwardly performing drummer hitting the drums on the right moments. The next steps involve working on more natural poses and dealing with alternate use of both hands for quick sequences. A draft animation of the first seconds into the song can be seen here:


E46 3D model – first results

< Previous article on series Next article on series >

First final results for the virtual model of my BMW E46 are here!

Below are three renderings of the model within a 360 degree environment photo taken here. There are still some crucial elements missing like the rear view mirror and turn lights.

Below are some pictures corresponding to different phases of the project:

Blueprint overlays used to create the main curves


3D rendering of main curves


Comparing virtual and real models


Main curves rendered for 360/3D VR test


Overall chassi shape


Skinning the model


Differentiating and articulating panels


Fully skinned model


Testing tail lights – each one is realistically modeled using a reflector, light-emitting bulb and textured transparent plastic


Detail of rear axle components


Modeling the dashboard and center console


A quick rendering of the interior


Hinged doors


Nearly finished model


Rendered within a 360 degree environment photo
< Previous article on series Next article on series >

BMW E46 3d model – part 3 – perfecting curves using a VR headset

The most important step in creating a realistic 3d model of an existing object is to capture the main lines that define that object in space.

After drawing the main lines in two dimensions over the reference images they must now be “bent” on 3d space to form a convincing representation of the model. It helps to have the real object at hand to check how these lines should look from specific angles, diving into more detail where needed.

To have a clearer view of how the 3d model looks like I have been using 360/3D renderings visualized using a VR headset. This allows a clearer perception of where the lines stand in space and their relationship to each other.

Please note that the best way to watch this video is using a VR headset and with full 4K resolution. If you watch it on a desktop all you will see is two images (left and right eye) one on top of the other. You can also watch it directly on an Android device but you will be loosing the 3D part of the experience.

Enjoy!

Blender – cloud shadows over terrain with cycles

I have been trying to make some 360 VR animations of scenes on earth orbit and for that my starting point has been this excellent How to Create a Realistic Earth in Blender tutorial.

However, to render for 360 in Blender the camera has to be set to Panoramic Equirectangular, and that means that Cycles render engine must be used.

This article describes how I managed to get one of the basic requirements for a realistic earth rendering which is making the clouds cast shadows over the terrain.

I started by setting up a simple scene with two planes illuminated by a distant sphere with an emitting material (the white sphere on the top). The two planes represent the terrain and the cloud cover separated by a very small gap.

Scene setup in blender

I used two high resolution images to texture each of the planes:

Separate renders of both terrain and cloud layers:

Rendering with both layers. The shadows cast by clouds over the terrain are clearly visible.

Cloud shadows over terrain render

This was done using the following settings for the Terrain and Clouds materials:

Please note that an additional clouds_inverted.jpg image is used. This is an inverted image of the clouds.jpg image to drive the transparency of the cloud layer: high (white) areas on the cloud cover are transformed into low values driving reduced transparency and projecting shadows over the terrain.

Next step will be modeling how a giant Suzanne will look like from orbit…